

Getting started
The desktop client is the recommended way to start. It provides a graphical interface for the local Runtime, accounts, memories, models and AI-tool integration. If you prefer a terminal or cannot use the desktop client, follow the CLI alternative.
Install the desktop client
- Open Client 2 releases and choose the file for your operating system and processor. The release page lists checksums and version notes.
- On Windows, download
respire-windows-amd64.exefor x64 orrespire-windows-arm64.exefor ARM64 and run it from a permanent writable directory. Windows 10 or later and WebView2 are required. - On macOS, download the matching
respire-darwin-amd64.ziporrespire-darwin-arm64.zip, extract it and keepRespire.appin a permanent writable location. macOS 12 or later is required. The app is not Developer ID signed or notarized. - On Linux, download the matching
respire-linux-amd64.tar.gzorrespire-linux-arm64.tar.gz, extract it and run the executable. A graphical session, GTK 3, WebKitGTK 4.1, X11 client libraries and system libraries compatible with Ubuntu 22.04 are required. These applications use glibc and do not run directly on Alpine/musl.
You do not need Node.js, npm, Go or Rust to use the desktop app. Desktop and CLI releases are separate; a desktop download does not guarantee a matching Runtime for every platform. See platform support for prerequisites and verification limits.
For example, CLI 1.0.19 did not include an asset for Intel macOS. On an Intel Mac, check whether the chosen release provides a matching asset; the client can also connect to a compatible local Runtime that is already running.
Connect the Runtime
On first launch, choose the interface language when prompted; you can change it later at the top right or in Settings. Then check the connection indicator in the sidebar. The app can connect to a compatible local Runtime. It can also download and install the matching CLI and Runtime itself; npm is not required for this installation. If no Runtime is available, open Updates, choose Download & install, and follow the displayed status. A missing release asset or incompatible version is reported in the client; see Diagnostics if it does not connect.
In the image below, Download & install is in the CLI / Runtime panel on the right. The screenshot shows Client 2 0.2.25 with simulated running and installation states.
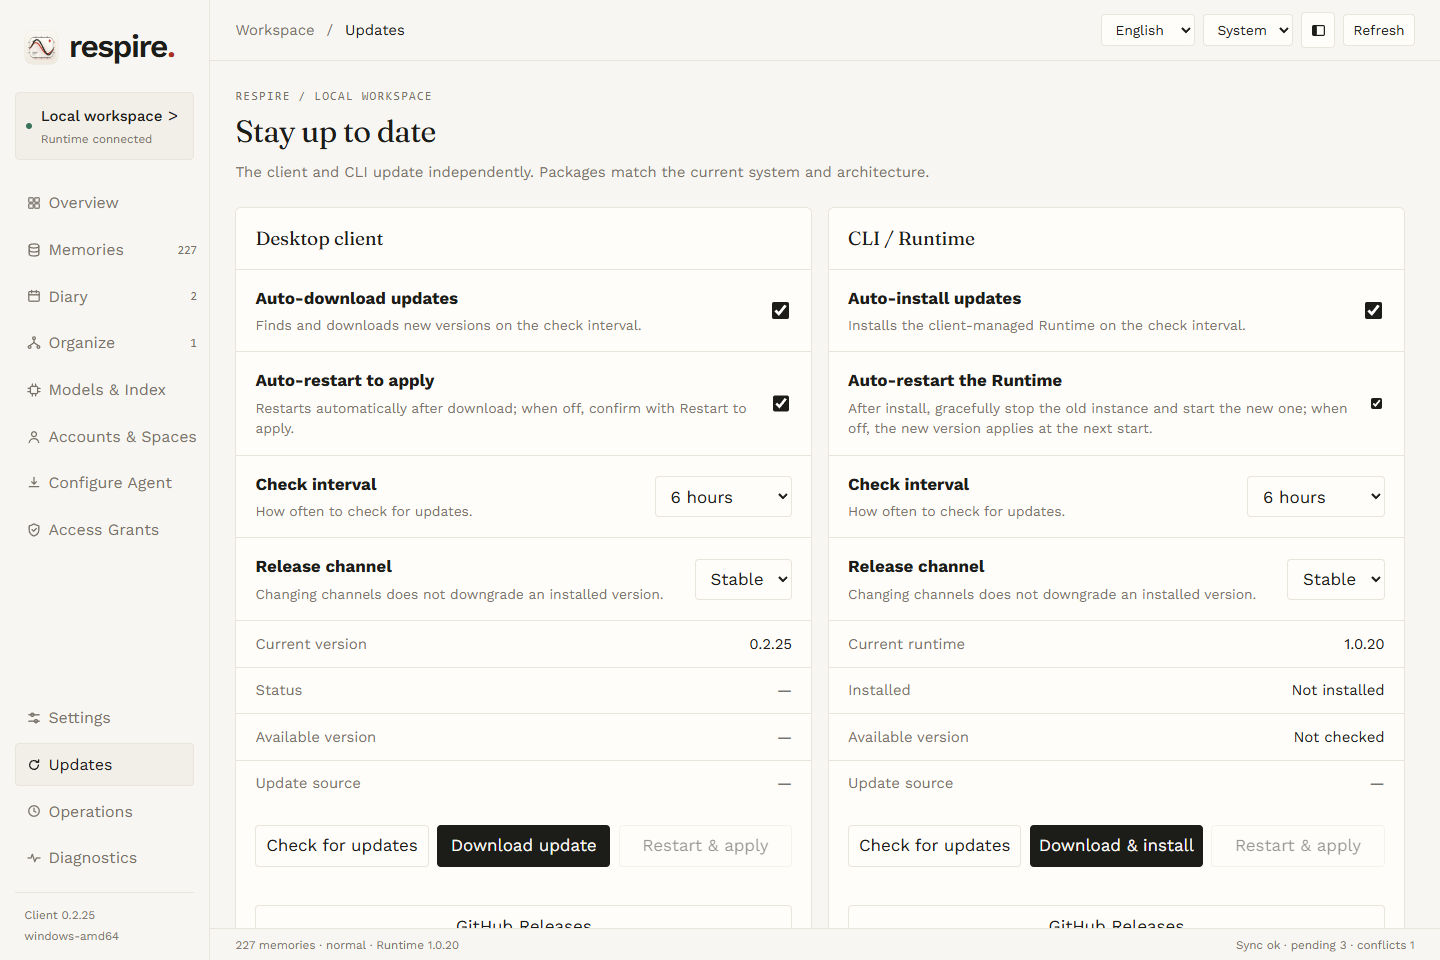
If automatic Runtime restart is off, the installed version applies the next time Runtime starts. When available, use Restart & apply in the CLI / Runtime section to start the new version.
Client 2 keeps its managed CLI in a versioned directory. It does not necessarily add rsrs to your terminal or agent PATH. If a plugin cannot find it, see CLI access for plugins.
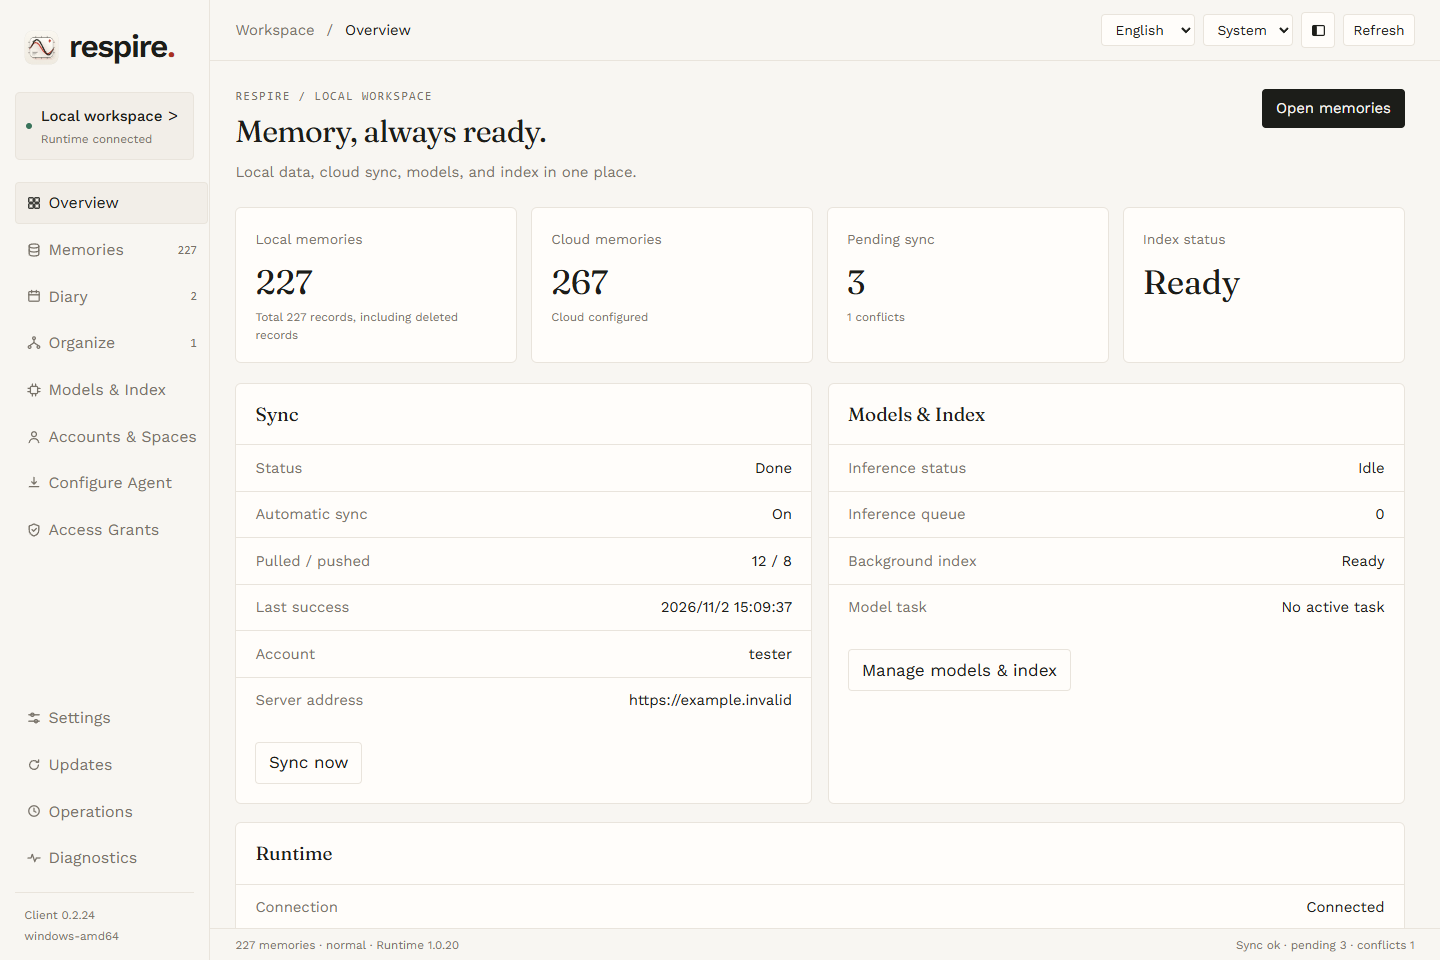
The screenshot shows the Client 2 0.2.24 frontend with simulated data, not a real account. The interface and status can differ on your device.
Sign in or create a local library
Open Accounts & Spaces. If you already have an account, choose Browser sign-in or the available password sign-in and complete the prompts. On a new device, follow the recovery flow for your existing keys.
To create a cloud account, choose Register account under Account login and recovery, enter the server and account credentials, and securely save any recovery material returned. Password authentication requires CLI 1.0.18 or a compatible version with account RPC support.
For a new local-only library, choose Initialize offline memory store. This creates recovery material for a library without existing local keys; save that material privately. Do not generate replacement keys for an existing library merely to fix sign-in. Cloud sign-in and sync can be configured separately.
Connect an AI tool
Open Configure Agent, choose an instruction mode and enable the agent you use. The client writes instructions and prepares or installs the matching plugin where supported. Some hosts require you to finish installation or trust hooks in the host itself; follow the result shown on screen and the agent plugin guide.
Review the destination and existing instructions first. Switching mode rewrites instructions for enabled agents; disabling an agent removes its injected instructions but leaves the plugin installed. For DSH, injection can overwrite ~/.dsh/AGENTS.md; inspect and back up that path first.
Create and find a memory
Open Memories, choose New memory, enter a title and content, then save. Search from the same page or ask your connected AI tool about the saved fact. Similar-memory suggestions need a decision; a pending suggestion is not a completed write.
The client guide covers the pages, screenshots and data boundaries. For models, open Models & Index; model weights are downloaded separately and are optional for basic use.
CLI alternative
For terminal workflows or systems without the desktop app, see Standalone CLI installation.